Programming the Device
Revision as of 02:36, 17 October 2008 by Nelson (talk | contribs) (→Loading Firmware: modify the loading part of wiki)
Contents
Requirements
Hardware
- PC with COM port (Windows XP Installed for MPLAB)
- ICD2 Programmer
- Target Board
- 5V Power Supply
Software
- MPLAB IDE v7.50: v7.60 is not compatible with our current ICD2 Programmers. There are consistent "Devices cannot be founded" warnings.
- dsPicProgrammer (dsPicProgrammer.jar)
Files
- dsPicBootloader (bl_5011.hex). Original assembly code by ingenia can be downloaded from here.
- Application hex file (e.g. app.hex)
Loading Bootloader (Once only)
| Step | Remarks |
|---|---|
| Install MPLAB IDE |
|
| Install USB Driver |
|
| Select Target Chip |
|
| Target <-> ICD 2 |
|
| ICD 2 <-> PC |
|
| Load Bootloader |
|
| Start Programming |
|
| Finishing |
|
Loading Firmware
- Download dsPic_Programmer.zip
- Save to a directory eg. desktop
- Unzip the dsPic_Programmer.zip, then you have unziped file.
- Drap the unzip file to a director.
- eg. USB memory devics
- Save your .hex file(foo.hex) to your directory location (e.g. C:\dsPicProgrammer\)
- [Save to your hex file PIC]
Download Firmware
- Start a Command Prompt
- Start -> Run
File:2 1 run.JPG - Enter cmd
File:2 2 cmd.JPG
- Start -> Run
- Run dsPicProgrammer
- Make sure your device is connected through a "Direct RS232 Cable" to PC Serial Port.
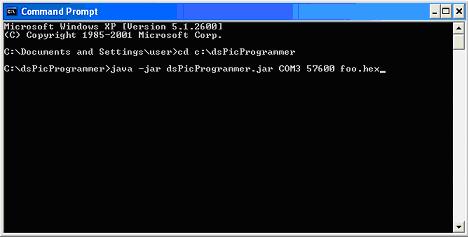
- Change to the directory where dsPicProgrammer.jar is located and run the command:
- [path/to/java/]java -Djava.library.path=[path/to/rxtxlib] -jar dsPicProgrammer.jar COM1 115200 foo.hex
- for example, jre\bin\java -Djava.library.path=.\rxtx\bin -jar dspicProgrammer.jar COM1 115200 foo.hex
- Or directly using dsPicProgrammer.bat COM1 115200 foo.hex(Windows)
- java -jar dsPicProgrammer.jar /dev/ttyS0 115200 foo.hex (Linux)
- [path/to/java/]java -Djava.library.path=[path/to/rxtxlib] -jar dsPicProgrammer.jar COM1 115200 foo.hex
- where COM1 is your COM Port ID
- 115200 is communication speed [in bps]
- foo.hex is your firmware new file
- When the program prompt you for an input, press y:
File:2 4 prompt.JPG - If communication can be established, you should see something like this:

- Wait until programming is completed.
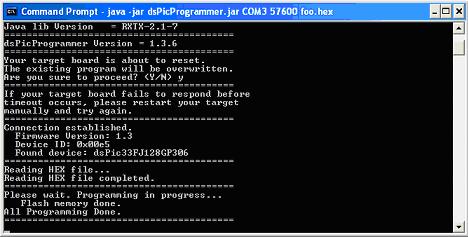
- after all completed, power OFF your device, then power ON again, enjoy your new updated.


Troubleshooting
Invalid COM Port
- In case of selecting an invalid COM port, you should see the error message:
gnu.io.NoSuchPortException: Choosing COM Port Error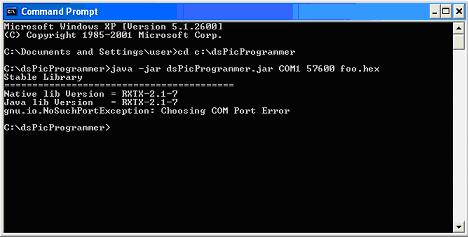

Missing firmware file
- In case of selecting a firmware file that does not exist, you should see the error message:
java.io.FileNotFoundException: foo1.hex <The system cannot find the file specified>

Missing RXTX driver
- In case of missing the RXTX driver, you should see the error message:
Exception in thread “main” java.lang.NoClassDefFoundError: gnu/io/UnsupportedCommOperationException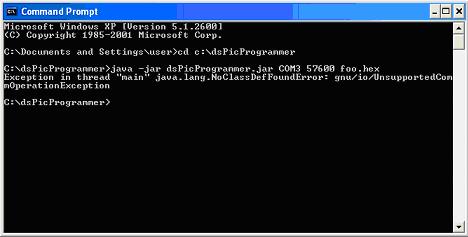
